Tuesday, 6 September 2011

Guerilla cooking

I rented an apartment on the meditterranean for a week to study. The plus to this was that I was away from my normal space, and forced to study. The hard part was that being away from my kitchen, its tools and ingredients.

You don't realise what you have till its gone!

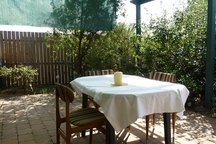
I arrived to find a kitchen that did have pots and a fry pan, a microwave, two hotplates (which I discovered through bitter trial and error have their numbering back to front), crockery and cutlery.

The glaring omissions were that it had no oven, sharp knives (a blunt paring knife and a twisted out of shape blunt peeler were in evidence), chopping board, storage containers, cooking tools such as slotted spoon, serving spoons, tongs, ladle.
Also no food.

Well, to give credit where it is due, there was a bottle of salt. So what to buy? I had no desire to buy a whole pile of foodstuffs and kitchen tools for someone else. I needed food for 5 days of staying in, so I needed variety, simplicity, and flexibility. And a sharp knife.

When I got to the supermarket I found some cheeses that had a cheeseboard included for free. 1 problem down. I found a little purple knife for 4 euros. Another problem down. A packet of "herbs de provence", some oil, pepper and I was just about at the end of the things I was willing to buy and donate to the apartment owner. Until I stumbled upon one of those sets of plastic containers... 14 containers for 3.90 euros. Yup I will have that.

I bought some meat, some bread, some vegetables... the usual stuff. I was set, vaguaries of my desires set aside.

Two days in and my second meal of pork chop, potato and sweet potato. The first time around it was burnt pork chop (see above comment on the stove) and mashed potato and sweet potato (pressed with a drinking glass then mashed with a fork). This time I had an onion to add to the excitement and had boiled the potato and sweet potato. But the dish cried out for a gravy. But... I had no flour, no stock... nothing to make it from!

I looked around. Ahah. There was the packet of french onion soup I had bought in case the predicted rainy day happened. There too was the "pompote" I got as part of my 'kids meal' at a cafe the day before (I usually find that a kids meal is actually more than enough food than we need and, limits in options aside, is very good value. 3.50 euros for a little hamburger patty, fries or vegetables, a drink and a dessert [the aforementioned pompote]). A pompote is a sort of apple mush in a squishy tube.

So I fried up my fresh onion, sprinkled on a tablespoon of the french onion soup mix and squeezed out a good dollop of the pompote. Gradually added some water and raised it to a simmer. What do you know? I had a very yummy gravy!

It just shows what you can do with a bit of imagination and willingess to experiment.

Sunday, 27 March 2011

Shared redaction: Roman "Sauce for grilled young tuna"

This recipe is from book 10, chapter 1, recipe 13 of Apicius - a Roman 1st century cookbook. The translation is by Grocock and Grainger.

The original recipe has no quantities and is translated as:

Pepper, lovage, oregano, green coriander, onion, de-seeded raisins, passum, vinegar, liquamen, defrutum, oil and cook it. This sauce is also suitable for boiled fish. If you wish, add honey too.

No quantities, no hints, just that.

So.... how did we turn this into a recipe that you and I might use? After all there are some ingredients here that you are unlikely to be able to buy off the shelf! Well with a bit of research you will find that liquimen is a form of fish sauce also known in roman recipes as "garum garos" & "muria". An acceptable replacement for every day use is Thai fish sauce. Defrutum is made from reducing sweet wine or sweet grape juice (must) to 1/3 of its original volume. Passum is sweet raisin wine (muscat is the perfect thing).

So, my friend Steve and I got busy playing with his beautiful new craticula - a Roman stove, based on one found in Pompei. He also has a lovely matching Roman pot to use as well.

Here is the recipe we came up with - it is very easy and we decided a definite two thumbs up from all of those who ate it. The sauce is enough to go with fish for four people.

3 tsp Thai fish sauce
1 cup muscato reduced to 1/3
1/3 cup muscat
1/4 cup of red wine vinegar
3/4 cup water (Roman vinegar was much weaker than our modern 5% acid vinegars)
2 tblspn chopped coriander (we used 1 because one of our eaters is not keen on coriander)
2 tblspn lovage (we couldn't find lovage in fact on the day, so used 3 tblspn flat leaf parsley)
1/3 cup raisins
1/2 a large onion
1 tsp freshly squeezed pepper
1/3 cup oil
1 tsp dried oregano (if using fresh then 2 tblspns)

700g tuna

Slice the onions into fine rings (you can chop finely instead - we did the first time but think the sliced rings would be prettier).

Place all the ingredients in a pot. Raise to a slow boil and simmer for about half an hour. Grill your fish and then serve with the sauce on top. You can stir a little honey in if you like a little sweetness in your sauces.

We tried this both with tuna and a milder flavoured fish (haddock) and recommend you stick to a good meaty fish as the haddock was overpowered.

This was so yummy that we sopped up the left over sauce with bread... mmm....

Saturday, 5 March 2011

Apple and cinnamon cupcakes


2 tsp cinnamon
4 tsp vegetable oil
4 tsp baking powder
250g caster sugar
320g plain flour
50g unsalted butter, melted
2 lightly beaten eggs
175ml buttermilk
2 peeled finely diced apples

Turn the oven to 175 degrees (350F). Line a cupcake tin with paper liners (this recipe makes 12 decent sized cupcakes)

In a bowl combine the sifted dry ingredients.

In a large bowl beat the liquid ingredients until well combined. Add the dry ingredients and beat until nearly combined. Stir in the apples - careful not to overmix!

Bake for 20 minutes. Cool for 5 minutes, and then remove from the tin and cool on a wire rack. Top with brown sugar frosting. These keep for up to 2 days or freeze (without icing for up to 3 months).

Thursday, 24 February 2011

Honey malt slice

This wickedly rich slice is based on a recipe from the Women's Weekly "biscuits and slices" recipe book.

340 grams of butter
2/3 cup honey
1 1/2 cups malted milk powder
4 cups corn flakes
4 cups rice bubbles
1 cup ground almonds
1 cup desiccated coconut

1. Lightly grease and line 2 20x30cm baking trays. Take a sheet of baking paper and lay it along the pans, allowing the paper to extend beyond the edge of the pan.

2. Combine the malted milk powder, butter and honey in a saucepan. Stir on a low heat until the butter is melted. Pour over the dry ingredients, stir, then pour the mixture into the pan. Cover with plastic wrap and refrigerate till set.

Monday, 6 December 2010

Pear and butterscotch clafouti

Clafouti was originally made with cherries, but has developed far further and now includes all sorts of fruit. I love it, as a simple, quick to make and incredibly elegant dessert.

Traditional cherry clafouti includes a splash of kirsch. I decided to make a pear clafouti this time around - decided by having a surfeit of eggs in the house, and a large tin of pears at hand. To add a little extra twist, I had a think about flavours and concluded that butterscotch schnapps might just work. And indeed it does - the butterscotch schnapps being quite a warm creamy flavour it worked well with the custard and contrasted with the slightly crisper sharper edge of the pear.

Now I am sure a purist would use freshly sliced pears for this recipe, but then again, a purist wouldn't be allowing butterscotch schnapps anywhere either, so they can go be purist and we can enjoy the fruits of our experimental labours. Tinned pears mean that you can create this delicious dessert at any time of the year or day of the week. If you do use fresh pears, peel and core them, and slice them thinly.

Ingredients

Butter
5 eggs plus 2 egg yolks
1/2 cup vanilla sugar (I make my own by keeping my vanilla bean pods in the sugar jar)
1/2 cup sifted flour
1 and a half tablespoons butterscotch schnapps
1 cup (250ml) cream (normal 35% fat cream is fine; occasionally I even use sour cream)
3 extra tablespoons of caster sugar
1 large tin of pears, drained

Method

Preheat the oven to 180 degrees.

Take a large ceramic or glass pie dish (a gratin dish will do at a pinch). Grease the bottom with the butter and sprinkle it with the caster sugar; shake the dish to get an even spread of sugar.

Place the eggs and vanilla sugar in a bowl and beat until pale and creamy Sprinkle on the flour, add the cream and the butterscotch schnapps and mix with the whisk to combine well.

Arrange the pears around the dish in an attractive pattern. Pour the batter over the top.

Bake for about 45 minutes, until set. Allow to cool, and serve sprinkled lightly with sugar, with or without icecream.

Chocolate Caramel Slice

This is a bit of an Aussie classic, and is totally rich and sweet and addictive. I took a tray of these to a potluck the other night. My friend Kate tried one and decided that she was skipping all the other food at the party (quiches, salads, crumbles and pies) and was going to eat nothing but these for her dinner!

Base
2 cups self raising flour
250g butter
1 1/2 cups dessicated coconut
1 cup fine sugar

Caramel Layer
2 tins of sweetened condensed milk (around 400g each)
60 grams of butter
60mls (4 tablespoons)golden syrup

Topping
300g dark chocolate
40g copha/vegetable shortening


Method

Turn the oven on to warm up, to 180 degrees. Start by making the base. Put all the dry base ingredients in a bowl. Melt the butter, allow to cool a little and then mix into the dry ingredients. Line the base of a baking dish with baking paper (allowing the paper to go up two sides to help you get the slice our later). Tip the base into the tin and spread and press down with the back of a spoon.

Bake for 10 - 15 minutes until lightly golden. Cool.

While the base is baking, start the caramel - put all the ingredients in a pot and heat them, stirring continuously for 8-10 minutes - it will thicken and go golden. Pour over the biscuit base and spread out to ensure the base is covered. Cool until set (this will take 3 or 4 hours in the fridge).
Then, in a double boiler, heat the chocolate and copha and stir together till melted and pourable. Pour over the caramel and biscuit, and then cool again. Cut into squares to serve.

Sunday, 19 September 2010

Hmmm... my project food blog intro

So I decided to enter this "Project Foodblog Challenge" thing. This first step is more challenging than I expected. I have to share with you what defines me as a food blogger and what makes me a food blog star... It is rare that I analyse this particular part of my life.

Like most of my foodblogging friends I am passionate about food and cooking.

I guess what I have that is perhaps a little rare in the grand foodblog community is simply the span of my cooking. Not just doing home cooking, nor modern cooking, nor cooking from a particular area, my food spans not only countries, but centuries.

How many foodbloggers are catering for 200 people, as well as making dinner for one? How many are exploring medieval and renaissance recipes as well as inventing completely new and different food? Giving restaurant reviews across the world, as well as sharing recipes and cooking tips. How many are cooking Italian, French, Japanese, Australian, English, Malaysian, Indonesian, Hungarian... the world on a plate? Hosting and cooking challenge dinner parties, organising social restaurant outings, and teaching cooking from pasta to sushi? Ooh, and I forgot.. doing a bit of food design for my friend's published cookbook on the side. Many are doing one or two of these things, but I suspect very few do them all.

I hope that what I also do is share what I love most about cooking: the adventure, the fun, and how wonderfully simple it all can be.

I put together this photo montage of myself, to sort of sum up my foodie self... ======>

To vote for me and keep me cooking and experimenting, head over to the Project Foodblog site.