Tuesday, 5 May 2020

Crumpets

It is fun to make your own crumpets from a few simple ingredients. These crumpets are slightly softer than the commercial variety. They can be frozen.

Ingredients

4 cups plain flour
2 tbsp baking powder
1½ tsp salt
1½ tsp sugar
3 cups warm water 
1 tsp instant yeast

 Method

Sift flour, baking powder, sugar, salt into large bowl. Dissolve yeast in a little water, and when all the yeast has been incorporated into the water add it to dry ingredients. Beat until smooth.

Pre-heat a frypan, lightly grease some egg-rings, put them in frypan to heat them through. When hot, three-quarters fill the rings with batter.

Allow to cook over low heat for approximately ten minutes or until surface is covered with holes. Remove rings.

Cover frypan and cook further 2 to 3 minutes or until surface has set. Remove from pan, cool on wire rack.

When cold, toast and serve with butter.

Maple pecan pinwheels

Ingredients

Biscuit 

185g butter roughly chopped
2 cups plain flour (300g)
½ cup brown sugar (100g)
2 tblspns maple syrup
1 egg yolk

 Filling 

1/3 cup maple syrup
½ cup pecan nuts very finely chopped
4 tsp cinnamon sugar

Method

Put the butter, flour and sugar into a food processor and process until the mixture looks like fine breadcrumbs. Add the maple syrup and egg yolk, and process again until the mixture forms a ball, then remove from the processor, and knead on a lighly floured board until smooth. Wrap in a 60cm long piece of plastic wrap (there is a reason for that length) and put in the fridge to rest for an hour.
Remove the wrap and set it aside for later.

Roll out the dough between two sheets of baking paper – you are aiming to get a rectangle of dough 48cm long and 28cm wide (which is the width of the average sheet of baking paper). You don’t want to make it too long, because it needs to be able to fit in your fridge. I found that putting the baking paper on a silicon sheet helps to keep it still on the bench.

Spread the maple syrup on the dough, sprinkle with the pecan and cinnamon sugar. Roll it up along the long edge, using the baking paper to help. Wrap in the plastic wrap and put in the fridge for 30 minutes.

Preheat your oven to 180°.

Remove the plastic from your roll, and cut 1cm slices, and bake on a greased baking tray (I reused the baking paper). Bake for about 15 minutes until golden brown. Cool for 5 minutes on the tray before moving to racks.

Makes about 50 biscuits.

Saturday, 11 October 2014

A foodie in Japan... a photographic view of a week in the orient...

I just spent a  really delightful week in Japan, my first trip there ever.

The food was occasionally confronting, oddly named, but pretty much both cheap and delicious.  I am not going to give you restaurant reviews, but just a bit of a visual tour of what you might find in Japan...

 My first lunch.. gorgeous tempura
 and such a pretty soup - the autumn leaf is made of layers of beancurd skin apparently
Matcha and a sweet at the golden temple
 A home cooked meal - okonomiyaki (a sort of Japanese pancake with cabbage in it and topped with salted pork)
Japan's equivalent of lutfisk or balut - something that most other countries occupants find completely inedible.  Fermented soy beans, they smell outrageous and taste, sort of like vegemite gone off.. I was grateful for my hayfever blocked nose when I tried it!
 A sort of corn fritter on a stick... yummmmm
 cheap and cheerful bento box, still beautifully presented
 the "autumn feast" in a rather fancy restaurant... so much food!
Plastic food for sale in the plastic food shop!
 More plastic food
 Looks remarkably real some of it
 Some rather less so
and some uncannily real looking
Real food, a nice simple dinner
A speciality of Sendai - beef tongue. 
and at the coast, how can you go past fish and chips?  Well... .tempura fish and vegetables anyway. 

Tuesday, 19 March 2013

Restaurant review: Canberra: Koochi Afghan cafe

Dear reader,

My penurous state has meant that I haven't been in a position to indulge myself fully in rediscovering the joys of the Canberran restaurant scene, however that does not mean I have been entirely stuck at home researching old recipes.

In fact, the other day I found a little gem that I thought I really had to share with you.

The Koochi Afghan cafe is in Gungahlin - yes I know for many of my Canberra readers, this is the equivalent of outer Mongolia, and I admit that I was not holding out a great deal of hope to find a decent meal.

But Koochi sparked my curiosity and I decided to give it a go.  

The restaurant was quiet (but so was the whole of the area at the time), with only a solo diner and a small family beside myself.  I was invited to sit anywhere, and settled myself down in a window seat.

The decor is all very modern, apart from the rather charming ceiling which has wooden beams and is hung with modified kerosine lamps.

I ordered a cup of tea and chose for my lunch Borrani Bonjon - described as pan-fried eggplant, topped with tomatoes, onions and drizzled with yoghurt and dried mint, served with rice. 

Now I do love a bit of well prepared aubergine, and as the dish was placed before me I had to admire the colour and presentation - a rich red, swirled with yoghurt.   They gave me the dish of aubergine, rice, a yoghurt based dip, and a fresh condiment that they called chutney - but you need to imagine something more like a light chilli dressing.

The scent of my dish was so tempting I took a bite immediately.  Oh my.  What a glorious balance of sweet and savoury and of delicate spices.  It was at that moment that I decided that I had to write this review.  That is why the photo I took (which I will post shortly) has a bite out of it.

I didn't quite get to the point of licking the plate, but I can promise you, there was not a morsel left of that dish.  The price of this memorable meal?  $12 for the dish itself - prices for meals range from 12 to 32 dollars, depending mostly on the meat factor. There is a 32 platter to share for two, which I would like to try next time.. 

Try it... go on, head out to outer Mongolia and let me know if you love it too!

Koochi Cafe
Gungahlin Marketplace


Tuesday, 25 September 2012

Deepest Darkest Chocolate Fudge biscuits

Ok, I am about to share with you one of my most precious recipes. These amazingly rich, tasty and chewy biscuits (cookies for my US friends, so don't go thinking this is a scone recipe!) are seriously unbelievably good.  The recipe was given to me by my friend Jocelyn, for which I will thank her forever.

It is a rare recipe that uses this much chocolate without being too sweet. Cocoa, melted chocolate, chocolate chips, this recipe has it all, and the final result is truly special. 


One of the fun things too about this recipe is sharing the list of ingredients with friends... making a double batch particularly so, because then you can tell them that it contains 1.3 KILOS of chocolate chips. 

I think that one of the keys to this recipe is beating the butter and sugar by hand... I don't know why it is, but I do it by hand, and my version seems to come out better than those made by friends using a mixer. Proof that there are times in life, where it is best to do things the slow way.  If you are going to use a mixer, I advise beating on a slow speed.

Deepest Darkest Chocolate Fudge Biscuits (cookies)

214g plain flour
56g cocoa
1 tsp bicarbonate of soda
a pinch of salt
227g milk chocolate broken into pieces
113g unsweetened chocolate broken up (a nice dark bittersweet will do)
340g soft light brown sugar
170g unsalted butter (take out of the fridge to soften)
3 eggs
1 tsp vanilla essence
OPTIONAL - 680g plain chocolate chips. 

Method

Sift flour, cocoa, bicarb and salt. Set aside.
Put plain and unsweetened chocolate pieces into a double boiler and heat for 12 - 15 minutes. Stir till smooth and keep at room temperature until needed. (You can microwave the chocolate instead, but be very careful not to over cook it)
Beat butter and sugar. Once creamed, add eggs, one at a time, beating into to the mixture. Add vanilla essence and beat. Add chocolate and beat. Add flour mixture and chocolate chips stirring until thoroughly combined.
For lovely big giant cookies, drop a tablespoon of mix per biscuit onto baking sheets (about 6-8 biscuits per sheet).   For more normal sized biscuits, a heaped teaspoon is about right. 
Bake on the top and middle rack of the oven at 170ÂşC for 15 minutes, rotating half way through baking time. Do keep an eye on the time, as the high sugar content means that they can burn very easily. 
 
Cool on sheets for 5-6 minutes. Transfer to cooling rack. 

Sit back and enjoy one of the most sensational sweet experiences of your life.

Monday, 2 July 2012

Interesting new marinade

Last weekend I joined some friends for the weekend in a 17th century chateau in Burgundy (sorry I know I am boasting... I can't help myself!).

On the first night, we were cooking a BBQ for dinner.  My friend Christoph had bought some Bon Maman chestnut spread... he didn't quite know what it was when he bought it, but thought it might be interesting to try.

He and his girlfriend decided that it might be fun to use it as a sort of marinade on some chicken breasts they had bought for the BBQ.  I suggested that mixing it with grainy Dijon mustard might balance the sweetness, so Monika did just that; smeared the chicken with pretty close to even quantities of mustard and chestnut spread.

The chicken was cooked, and the marinade declared to be an unqualified success.  I thought I would post  it up here so that I would remember it, and maybe you could try it sometime.  It proves once more that the real key to exciting cooking is the willingness to just experiment, and try new things that you haven't tried before.


Tuesday, 6 September 2011

Guerilla cooking

I rented an apartment on the meditterranean for a week to study. The plus to this was that I was away from my normal space, and forced to study. The hard part was that being away from my kitchen, its tools and ingredients.

You don't realise what you have till its gone!

I arrived to find a kitchen that did have pots and a fry pan, a microwave, two hotplates (which I discovered through bitter trial and error have their numbering back to front), crockery and cutlery.

The glaring omissions were that it had no oven, sharp knives (a blunt paring knife and a twisted out of shape blunt peeler were in evidence), chopping board, storage containers, cooking tools such as slotted spoon, serving spoons, tongs, ladle.
Also no food.

Well, to give credit where it is due, there was a bottle of salt. So what to buy? I had no desire to buy a whole pile of foodstuffs and kitchen tools for someone else. I needed food for 5 days of staying in, so I needed variety, simplicity, and flexibility. And a sharp knife.

When I got to the supermarket I found some cheeses that had a cheeseboard included for free. 1 problem down. I found a little purple knife for 4 euros. Another problem down. A packet of "herbs de provence", some oil, pepper and I was just about at the end of the things I was willing to buy and donate to the apartment owner. Until I stumbled upon one of those sets of plastic containers... 14 containers for 3.90 euros. Yup I will have that.

I bought some meat, some bread, some vegetables... the usual stuff. I was set, vaguaries of my desires set aside.

Two days in and my second meal of pork chop, potato and sweet potato. The first time around it was burnt pork chop (see above comment on the stove) and mashed potato and sweet potato (pressed with a drinking glass then mashed with a fork). This time I had an onion to add to the excitement and had boiled the potato and sweet potato. But the dish cried out for a gravy. But... I had no flour, no stock... nothing to make it from!

I looked around. Ahah. There was the packet of french onion soup I had bought in case the predicted rainy day happened. There too was the "pompote" I got as part of my 'kids meal' at a cafe the day before (I usually find that a kids meal is actually more than enough food than we need and, limits in options aside, is very good value. 3.50 euros for a little hamburger patty, fries or vegetables, a drink and a dessert [the aforementioned pompote]). A pompote is a sort of apple mush in a squishy tube.

So I fried up my fresh onion, sprinkled on a tablespoon of the french onion soup mix and squeezed out a good dollop of the pompote. Gradually added some water and raised it to a simmer. What do you know? I had a very yummy gravy!

It just shows what you can do with a bit of imagination and willingess to experiment.

Saturday, 5 March 2011

Apple and cinnamon cupcakes


2 tsp cinnamon
4 tsp vegetable oil
4 tsp baking powder
250g caster sugar
320g plain flour
50g unsalted butter, melted
2 lightly beaten eggs
175ml buttermilk
2 peeled finely diced apples

Turn the oven to 175 degrees (350F). Line a cupcake tin with paper liners (this recipe makes 12 decent sized cupcakes)

In a bowl combine the sifted dry ingredients.

In a large bowl beat the liquid ingredients until well combined. Add the dry ingredients and beat until nearly combined. Stir in the apples - careful not to overmix!

Bake for 20 minutes. Cool for 5 minutes, and then remove from the tin and cool on a wire rack. Top with brown sugar frosting. These keep for up to 2 days or freeze (without icing for up to 3 months).

Thursday, 24 February 2011

Honey malt slice

This wickedly rich slice is based on a recipe from the Women's Weekly "biscuits and slices" recipe book.

340 grams of butter
2/3 cup honey
1 1/2 cups malted milk powder
4 cups corn flakes
4 cups rice bubbles
1 cup ground almonds
1 cup desiccated coconut

1. Lightly grease and line 2 20x30cm baking trays. Take a sheet of baking paper and lay it along the pans, allowing the paper to extend beyond the edge of the pan.

2. Combine the malted milk powder, butter and honey in a saucepan. Stir on a low heat until the butter is melted. Pour over the dry ingredients, stir, then pour the mixture into the pan. Cover with plastic wrap and refrigerate till set.

Monday, 6 December 2010

Pear and butterscotch clafouti

Clafouti was originally made with cherries, but has developed far further and now includes all sorts of fruit. I love it, as a simple, quick to make and incredibly elegant dessert.

Traditional cherry clafouti includes a splash of kirsch. I decided to make a pear clafouti this time around - decided by having a surfeit of eggs in the house, and a large tin of pears at hand. To add a little extra twist, I had a think about flavours and concluded that butterscotch schnapps might just work. And indeed it does - the butterscotch schnapps being quite a warm creamy flavour it worked well with the custard and contrasted with the slightly crisper sharper edge of the pear.

Now I am sure a purist would use freshly sliced pears for this recipe, but then again, a purist wouldn't be allowing butterscotch schnapps anywhere either, so they can go be purist and we can enjoy the fruits of our experimental labours. Tinned pears mean that you can create this delicious dessert at any time of the year or day of the week. If you do use fresh pears, peel and core them, and slice them thinly.

Ingredients

Butter
5 eggs plus 2 egg yolks
1/2 cup vanilla sugar (I make my own by keeping my vanilla bean pods in the sugar jar)
1/2 cup sifted flour
1 and a half tablespoons butterscotch schnapps
1 cup (250ml) cream (normal 35% fat cream is fine; occasionally I even use sour cream)
3 extra tablespoons of caster sugar
1 large tin of pears, drained

Method

Preheat the oven to 180 degrees.

Take a large ceramic or glass pie dish (a gratin dish will do at a pinch). Grease the bottom with the butter and sprinkle it with the caster sugar; shake the dish to get an even spread of sugar.

Place the eggs and vanilla sugar in a bowl and beat until pale and creamy Sprinkle on the flour, add the cream and the butterscotch schnapps and mix with the whisk to combine well.

Arrange the pears around the dish in an attractive pattern. Pour the batter over the top.

Bake for about 45 minutes, until set. Allow to cool, and serve sprinkled lightly with sugar, with or without icecream.

Chocolate Caramel Slice

This is a bit of an Aussie classic, and is totally rich and sweet and addictive. I took a tray of these to a potluck the other night. My friend Kate tried one and decided that she was skipping all the other food at the party (quiches, salads, crumbles and pies) and was going to eat nothing but these for her dinner!

Base
2 cups self raising flour
250g butter
1 1/2 cups dessicated coconut
1 cup fine sugar

Caramel Layer
2 tins of sweetened condensed milk (around 400g each)
60 grams of butter
60mls (4 tablespoons)golden syrup

Topping
300g dark chocolate
40g copha/vegetable shortening


Method

Turn the oven on to warm up, to 180 degrees. Start by making the base. Put all the dry base ingredients in a bowl. Melt the butter, allow to cool a little and then mix into the dry ingredients. Line the base of a baking dish with baking paper (allowing the paper to go up two sides to help you get the slice our later). Tip the base into the tin and spread and press down with the back of a spoon.

Bake for 10 - 15 minutes until lightly golden. Cool.

While the base is baking, start the caramel - put all the ingredients in a pot and heat them, stirring continuously for 8-10 minutes - it will thicken and go golden. Pour over the biscuit base and spread out to ensure the base is covered. Cool until set (this will take 3 or 4 hours in the fridge).
Then, in a double boiler, heat the chocolate and copha and stir together till melted and pourable. Pour over the caramel and biscuit, and then cool again. Cut into squares to serve.

Sunday, 19 September 2010

Hmmm... my project food blog intro

So I decided to enter this "Project Foodblog Challenge" thing. This first step is more challenging than I expected. I have to share with you what defines me as a food blogger and what makes me a food blog star... It is rare that I analyse this particular part of my life. Like most of my foodblogging friends I am passionate about food and cooking. 

I guess what I have that is perhaps a little rare in the grand foodblog community is simply the span of my cooking. 

Not just doing home cooking, nor modern cooking, nor cooking from a particular area, my food spans not only countries, but centuries. 

How many foodbloggers are catering for 200 people, as well as making dinner for one? 
How many are exploring medieval and renaissance recipes as well as inventing completely new and different food? Giving restaurant reviews across the world, as well as sharing recipes and cooking tips.
How many are cooking Italian, French, Japanese, Australian, English, Malaysian, Indonesian, Hungarian... the world on a plate? 
Hosting and cooking challenge dinner parties, organising social restaurant outings, and teaching cooking from pasta to sushi? 

Ooh, and I forgot.. doing the food design for my friend's published cookbook on the side. Many are doing one or two of these things, but I suspect very few do them all. 

I hope that what I also do is share what I love most about cooking: the adventure, the fun, and how wonderfully simple it all can be. I put together this photo montage of myself, to sort of sum up my foodie self... ======> 

Tuesday, 31 August 2010

On a slightly different subject....

I have mixed pride about my food photography, and in fact my photography generally.

Sometimes I take shots that I am absolutely thrilled with, but rather more often the photos are ok at best. I do wish I had more talent, but to be truthful, don't spend the time really learning enough about photography to become expert. That said, among the chaff are some real gems and I have decided to share them in a more formal fashion.

I just wanted to tell you that I now have a Redbubble site, where you can buy prints in the form of greetings cards and posters of some of my photos. Even if you don't lash out and buy anything, I would love it if you visited my site and commented on photos you like...

Saturday, 14 August 2010

Tomato sauce/ketchup

So I had made the sausage rolls, but it seemed a terrible shame to serve them with commercial tomato sauce.

But what recipe to use? A quick rummage through my cookbooks turned up nothing. Hmm... time to get inventing!

1.7kg tomatoes, roughly chopped
4 large onions
1.5 cups vinegar
1 cup sugar
2 cups water

Chop the onions finely. Cook with a splash of olive oil in a deep heavy bottomed saucepan until softened and transparent. Add the other ingredients and bring to the boil. Drop to a simmer, and simmer for an hour, topping up with water if required. Push through a seive and pour into jars.

-----------
Someone asked for my judgement on how it worked out. I would describe it as a complete success (I don't post up my failures ).  Texturally it was just right, pouring and dipping in just the way you want from a sauce - clinging to the sausage rolls perfectly.

Well worth the effort to make it. It was a little spicier somehow than a commercial tomato sauce. I would definitely make this sauce again. 

Maybe if I am lucky one of the guests at the wedding will post up their perspectives on it!
 

Saturday, 22 May 2010

Party food - traditional sausage rolls

I have another catering gig - my friend Oggy's wedding. I gave the bride and groom a list of potential dishes, from which they could choose a menu. They asked what the chances were of having every one of them, as they liked the sound of all of them so much! But the groom also had his own special request: sausage rolls.

I have posted up a sausage roll recipe previously: my chicken, basil and prosciutto sausage rolls. Various friends having made them have declared them to be a great success. That said, these are not going to fulfill the desire of the groom: I think he wants a good red meat sausage roll. So a bit of experimentation has produced this recipe, which I think will fit the bill perfectly. It makes 100 cocktail sized sausage rolls. I know that this sounds like a lot, but believe me, they disappear quickly during a party!

You do need a food processor for this recipe, and it is super quick and easy. Be warned though, there is no way to avoid getting your hands messy!

1.3kg beef mince
2 medium eggs
2 large onions
2 1/2 cups fresh white breadcrumbs - use the food processor to process stale 'square' bread.
4tsp dried herbs - I used sage, oregano, basil and marjoram
1 tsp freshly ground pepper
1/2 tsp salt
1.5 kg pre-rolled puff pastry (5 rolls)
1 egg lightly beaten, for brushing on top of the rolls

Peel and roughly chop the onion. Pop it into the food processor and process until it is quite fine in texture (but not liquid!). Put into a large bowl with the breadcrumbs. Stir in the herbs, salt and pepper.

There is no need to rinse the bowl of the food processor. Just put in the mince (you might need to process in two lots) and process it down to make it a sort of paste. It doesn't need to be perfectly smooth, but it does need to be much finer than the original mince. This will help the filling to hold together. Put into the bowl, and break into the bowl, two of the eggs. With your hands, mix the whole lot together.

Cut the sheet of puff pastry in half lengthwise. Take a good handful of the filling and form into a fat sausage (I guess about 2.5 cm/1 inch in diameter) and lay along the long edge of one piece of the pastry. Brush the opposite edge with water and then fold the pastry over to make a roll. Place seam side down. Repeat with the other pieces of pastry.

Cut the rolls in 3cm lengths. Brush the tops with egg yolk, and chill for at least 15 minutes. Bake for about 15 minutes until golden brown in quite a hot oven - 240 degrees. Serve warm with tomato sauce, home made or otherwise. (These can happily be made the day before, or even made and frozen uncooked)

Friday, 7 May 2010

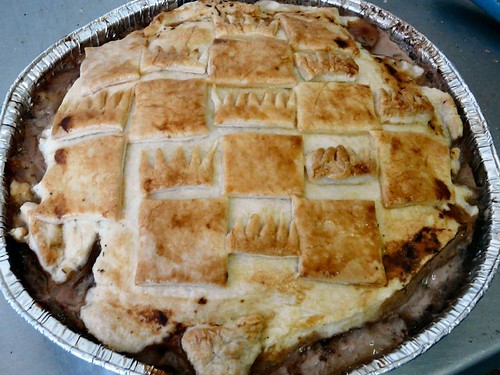
Medieval cookery - duck pies

This recipe for duck pie has few ingredients and may seem a little odd, using the juice but not flesh of onions as a seasoning. These were so good that back in the kitchens we spent quite a while trying to figure out an excuse not to send them out to be eaten at all... we wanted to keep them all for ourselves!

The hardest thing about the recipe is tracking down Verjuice. Verjuice is unfermented wine grape juice and is a common ingredient used in medieval and renaissance cooking. It has come back into modern cookery quite recently and adds a very special taste to dishes. In Australia, Maggie Beer produces verjuice commercially - sadly I have yet to find a supplier here in Europe.

At a total pinch you could use a very mild vinegar - I had a bottle of verjuice that a friend sent me and with experimentation, I made up a mixture of grape juice and wine vinegar and was able to get something that resembled verjuice for the feast, as my little bottle certainly didn't contain enough to feed 138 people!

Somewhat unusually for an ancient 'receipt', this recipe does have some guidance as to quantities of ingredients. My version used this as a guide but I made it with duck meat rather than a whole bird.

To bake a Mallard (The Good Housewife's Jewell 1596)

Take three or foure Onyons, and stampe them in a morter, then straine them with a saucer full of vergice, then take your mallard and put him into the iuyce of the sayde onyons, and season him with pepper, and salte, cloves and mace, then put your Mallard into the coffin with the saide juyce of the onyons, and a good quantity of Winter-savorye, a little tyme, and perselye chopped small, and sweete Butter, so close it up and bake it.

Take three onions and food process them. Pour 1/3 of a cup of verjuice into the food processor, then strain through muslin to extract the juices (I recommend setting aside the onions to make into onion soup). Take 1/2 a kilo of duck meat, chopped into pieces and marinate in the onion juice, with pepper, salt, 1/4 tsp ground mace and a pinch of ground cloves. I couldn't find fresh winter savory, so used dried - about 1/2 a tablespoon, then a teaspoon of thyme and a tablespoon of parsley.

Bake in a closed pie shell, or as little individual pies. Eat while piping hot.


Saturday, 20 February 2010

Quick restaurant review - Alanya

There are quite a few dishes that I miss from Australia. Good Vietnamese Pho, really spicy north Indian curries, Laksa, and Kabak Mucveri.

Now the latter is a Turkish dish, and you would think that being in Europe (and not that far from Turkey) it would be easy to get, but I haven't been able to find it, and even if I could, I suspect it would be a disappointment compared to the Kabak Mucveri in my fave Turkish restaurant in Canberra. A trip to Alanya was definitely on the list for my visit to Australia.

I got my chance, and met up with a friend and ex-colleague for lunch there. The restaurant itself hadn't changed much in the years I have been away. It is tucked away upstairs in the Style arcade in Manuka and has a big challenge to fight the trendy on-street restaurants that saturate this mini town centre. But fight it has, and for forty years (!) it has been serving Turkish food to hungry Canberrans.

The reason why it has managed to stay viable for all this time is because it is simply good. What more can I say than go there and check it out for yourself.

Address 22 Style Arcade, Franklin Street,
Manuka, ACT 2603
Phone (02) 6295 9678
Fax (02) 6295 9624

Friday, 5 February 2010

Spicy Roasted Carrot and Sweet Potato soup

This tasty winter soup was invented on a whim, as I cooked it up for a work lunch. It is fun having a workplace that uses both my normal work skills and occasionally some of my other talents! I served it up, and after a colleague tasted the leftovers, was promptly asked to do another batch for another lunch a few days later. I made the new batch and found it as tasty as the first, which tells me, this is definitely one to share with you all. Now, as usual, I was slack about weighing and measuring, but luckily the receipts from the supermarket have weights on them. 

It's funny because I thought this recipe is super simple, with only a handful of ingredients, but now that I list them out, I included 12 different things!
  • 1.2kg carrots
  • 1kg sweet potatoes
  • 3 large potatoes
  • 2 medium onions
  • 2 tsp fresh ginger
  • 1 cloves of garlic
  • olive oil
  • 1 litre vegetable stock
  • 2 lime leaves
  • 3 tablespoons of coconut milk powder
  • 1 good sized pinch of chili flakes
  • ~ 1 tsp lemon myrtle, coconut and chili seasoning
Peel and chop the carrots and sweet potatoes into even sized chunks. Lightly drizzle with just a little olive oil and sprinkle with salt. With your hands turn the pieces around to get them covered in oil, and then bake in a 200 degree (c) oven until the sweet potato has gone soft and browned. The carrots take longer to cook than the sweet potato, so while they may have browned a little, are not likely to be very soft. But don't worry about that as they will cook up in the pot - this is more to get that delicious sweet caramelisation taste into the soup.

While these are cooking, chop the onions - no need to be too fussy about how finely they are chopped as it will all be blended in the end. Brown the onion in a 5 litre pot with a bit of olive oil. Once they are transparent and going brown, add the finely chopped fresh ginger and the garlic - they will only take seconds to cook.

Once browned, add a splash of vegetable stock; enough to lift the caramelised onion and tasty bits from the pan.

Add the roasted orange vegetables, pour in the rest of the stock and add the lime leaves and chili. Peel and chop the potatoes and add them to the pot. Bring to the boil and then drop to a simmer. Simmer until the carrot and potatoes have softened - the potatoes will likely start to fall to pieces, while the carrots will crush easily with the back of a spoon.

Blend the soup with a stick blender. Stir in the coconut milk powder along with an equal amount of water. You may need to add extra water to thin the soup out as it gets very thick. If you are transporting it, I advise leaving it very thick to make it less likely to leak out of its container during transport, and then then when reheating. Reheat on quite a low heat, to prevent it sticking to the bottom. Pour into a pretty tureen to serve, sprinkle some of the lemon myrtle sprinkle and swirl it through. There you go... all finished!

Saturday, 19 December 2009

White Christmas

The white christmas of my childhood had copha and milk powder in it, if I recall correctly. A lack of ability to find copha in the shops here prompted the development of this very rich and tasty version. I hope you enjoy it as much as my friends have!

  • 600g white chocolate
  • 2 cups rice bubbles
  • 100g red glace cherries
  • 100g green glace cherries
  • 100g silvered almonds
  • 100g dried cranberries
  • 80g sultanas
  • 1 cup desiccated coconut

Method
  1. Line a 30cm x 20cm (base) baking pan with baking paper. Melt the chocolate in a heatproof bowl over a saucepan of simmering water (don’t let bowl touch water). Fold in the remaining ingredients. Pour mixture into the prepared pan, pressing down with a large metal spoon. Refrigerate for 4 hours or until set.
  2. Turn slice onto a chopping board. Using a knife that has been dipped in hot water, cut into squares. Serve.

Wednesday, 16 December 2009

Dark chocolate tartlets

Photo by Ed.
I served these tiny tarts at the wedding I catered for my friends Patrizia and Ed. (Full menu here). They were a real hit - rich and creamy and just the right size for a not-quite-guilt-free mouthful. 

Ingredients


320g dark chocolate, (at least 60% cocoa but I actually don't recommend more than 80%) 
500ml cream 
4 egg yolks 
2 whole eggs 
1/4 cup sugar 
gold leaf to decorate 

Method

 Combine chopped bittersweet chocolate and cream in a heavy saucepan. Whisk over low heat until chocolate is melted and smooth. Remove saucepan from heat and allow to cool a little.

In a separate bowl, whisk the egg yolks, egg & sugar. Very gradually whisk chocolate mixture into the egg mixture until smooth and blended.

Pour chocolate filling into crust, sprinkle with gold leaf, and bake at 180 degrees until set (about 15-20 minutes for a single large shell, or 5-10 for small shells).